8 Tips & Tricks for Shade Taking Success!

If you’re looking for some tips to improve your shade-taking abilities and thereby improve the outcome of your fixed restorations, then let us try to help. Here are some of the ways that you might be able to get a better shade.
For more information about Intraoral Dental Photography please consult these resources:
Tip #1: Let’s Get This Over With!
The best time to take a shade for a patient is when they first walk in. Taking shade early limits tooth dehydration that you might have to compensate for. This method can also be used as part of your patient procedure and information-taking process if handled correctly.
Consider dedicating a space in the practice to the shade process. This helps with issues of consistency that are discussed later in this article.
Treat the shade-taking process as a part of the routine, not a last minute item to check off a list. This can also help to cross-sell and up-sell patients who have been considering Teeth Whitening or other changes such as veneers.
Defer questions about changing shades to the clinician. Pass the information about the patient’s interest in changing shade to the clinician before patient evaluation.

Tip #2: Use natural light when possible.
Operatory light is not as accurate as you might think, with many lights focused on intensity over accuracy of color. Further, ever changing environments around the patient change shadows.
If you can’t use natural light, then Tip #3 is for you!
Tip #3: Learn from Social Media Influencers
If lighting is not consistent throughout your practice (for example. if all of your operatories don’t face the same light) you have so many inexpensive options for lighting that are consistent if not perfectly balanced, thanks to the advent of social media influencers and YouTube content creators.
There are even dentists who help with budget camera builds for dentistry!
Just want it now? Here’s the basics on a budget:
- Grey Neutral Backdrop for Patient Photos – $65
- NEWER Ring Light 5500k – $125 (we use this one daily in the lab!)
- A Color Calibration Card – $15 (cheap color communication with the lab!)
- Your (new-ish) Smartphone (clean the lens, you filthy animal!)
Tip #4: One Up, One Down!
Don’t just use (1) one single shade tab, even if you think you’re dead-on with the selection. Ideally, we would see the “correct” shade for the patient with one shade “up” and one shade “down” so we have context and the ability to color correct.
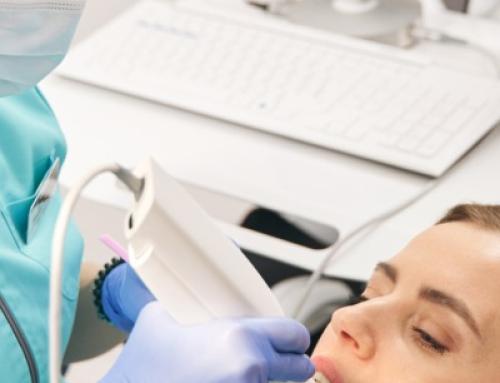
Shade-matching digital photography isn’t easy, but recent advancements in Smartphone Cameras have really changed the power of the tools we have available in the practice.
If you are using your smartphone camera, make sure you have a HIPPA compliant setup. Consider something like ShadeWave for an All-In-One solution.

Tip #5: Get Up, Stand Up….
Laying down in the chair isn’t the best, so get the patient while they’re up. We already discussed getting the patient shade before they get to the chair, so this is just another way to keep things consistent.
Tip #6: Reapply as neccesary…
If your patient is wearing visible makeup, such as lipstick or even shiny lip gloss, ask if they would be willing to wipe off for more accuracy. If they’re spending the money and time to get new teeth, they’ll be happy to comply.
Lipstick should be removed before shading. Shades taken against the contrast of heavy amounts of red can change the perception of shade to more brown.
Tip #7 : It’s more than just color!
Texture plays a huge role in obtaining lifelike results, especially when it comes to your dental lab implant and fixed cases.
To simplify the description of the surface anatomy of teeth, the crown and roots are divided into imaginary thirds. Each axial surface of the crown is divided into both vertical and horizontal thirds. The root is divided into horizontal thirds only.
- Each crown is divided into horizontal thirds–occlusal (or incisal), middle, and cervical (or gingival).
- Each mesial and distal surface of the crown is divided into vertical thirds-facial, middle, and lingual.
- Each facial and lingual surface of the crown is divided into vertical thirds-mesial, middle, and distal.
- Each root is divided into horizontal thirds–cervical, middle, and apical.
Tip #8: I see right through you…
Translucency is the aspect of the tooth that describes how “see through” the tooth is. This is most commonly seen in the incisal edge of upper anterior teeth. Communicate what you see clearly to the lab, as translucency can be difficult to clearly see depending on factors such as lighting and angle of attack.